
All posts on Getting started:
1. How to personalize your account
2. How to use the Web App
3. How to use the Desktop App
4. How to use the Mobile App
4a. Special features on iPhone and iPad
5. How to create Public Links
6. How to create Public Upload Folders
7. How to install the Appliance
8. Mail links instead of attachments
Install ownCloud as a virtual machine
An Appliance is a ready-made and prepackaged ‘guest’ operating system that contains all software and settings you’ll need to run a complex software setup. You can just install it inside your existing ‘host’ operating system, meaning the Windows, macOS or Linux that runs on your desktop PC. There are many reasons to install ownCloud as an Appliance in a virtual machine – one is ease of use, another is speed of deployment.
Instead of setting up the somewhat complex setup made up of, among others, the LAMP stack containing the Linux operating system, the Apache web server, the MariaDB database and the PHP scripting language, you can just download it as a pre-packaged solution called an Appliance.
For our ownCloud Appliance (the ‘guest’ operating system) we built on the Univention Corporate Server (UCS), an open source linux distribution that suits the needs of a lot of organizations through built-in support for corporate favourites like Microsoft Active Directory, Samba 4 and others.
To use the appliance, just install a virtualization software like ESXi, VirtualBox, VMware or KVM. For the purposes of this manual, we’ll stick to VirtualBox. Download and install VirtualBox on your machine, it is available for Windows, macOS, Linux and even Solaris. Then, download the ownCloud VirtualBox Appliance Image, it’s the .ova file that weighs in at around 1.7 GB.
Now start VirtualBox and select “File” -> “Import Appliance” and select the .ova file you just downloaded.

Then, check the settings and click ”Import”. If all went well, the appliance will open in a separate window, while VirtualBox will show a Manager interface showing the status of your virtual machines, just the one for now. In the separate window, configure your new appliance – choosing the language, locale and keyboard settings as well as the IP adress and the DNS Server, among others. You can probably stick with the defaults.

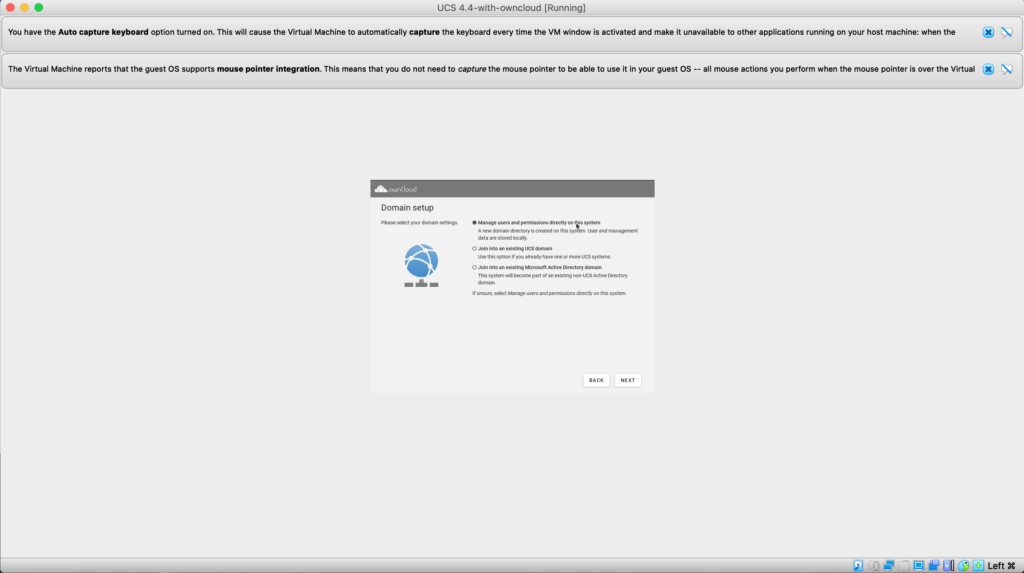
In the “domain setup” screen, you can choose to join an existing UCS machine cluster or a Microsoft Active Directory Domain. If you don’t know how to do this, stick to ”Manage users and permissions on this system”.
In the next screen, enter the name of your organization, your email address and set a password. Be sure to write down or remember the password, it is the root password for your appliance. Make sure you use a real, working email address you can access for it is used to activate the Univention Corporate Server so you have access to the Univention App Center.

On the next screen, leave the host settings as they are. On the next screen, confirm your configuration settings.

An assistant process will then use the data you entered to configure the guest system.

After the assistent is ready, click finish. In the next screen, the ownCloud appliance tells you the IP address with which you can access the web interface to manage your new ownCloud – please write it down! You can now minimize all the VirtualBox windows on your host system and switch to your browser. There, open the IP address of the appliance. It will prompt you to activate the Appliance by uploading your license file. Open your email account, then save the ucs.license file sent to you by UCS. Upload it, thereby activating the Appliance. After that, you should see the ownCloud Portal.

Click on Applications – ownCloud.

You can then log in as ‘Administrator’ using the password you created in the setup process – or with the username “owncloud” and the password “owncloud” (don’t forget to change the passwords and the standard usernames, too). An just like that – your ownCloud is ready and accesible in your local network without further configuration. To make it secure, check out how to add certificates


